From the Pinhole Box to the Simple Lens
We get an Image if we drill a little Hole. But, is it possible to do it better? Maybe with a Lens…
We saw in the previous chapter, "how the image is formed", that the rays pass through a very small hole in the middle of the frond wall of the box and, falling on the opposite surface, form the image. We said we call this a Pinhole Box.
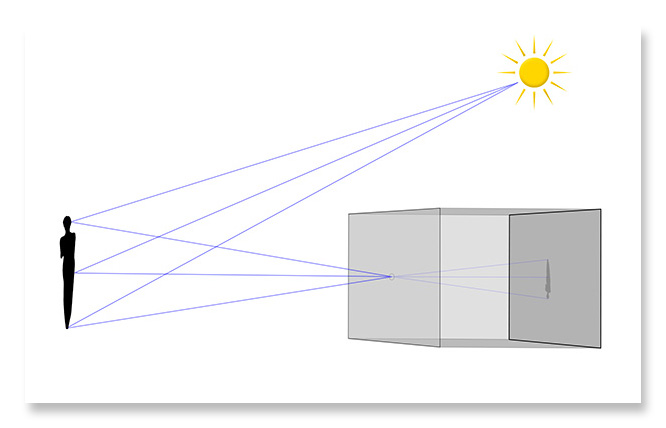
We could say that this setup is a perfect camera if it weren't for one very serious problem: the light reaching the final surface, where the image is formed, is not enough ! And this is because very few rays pass through the very small hole. That is, the light that finally accumulates on a point is minimal. Not strong at all ! So little that to get a complete image on some photosensitive material, we may even need hours of exposure. On the other hand, if we enlarge this hole in order to get more light, we come again to the problem of no image being formed since many rays from different points fall on one point on the photosensitive surface and create the blur.
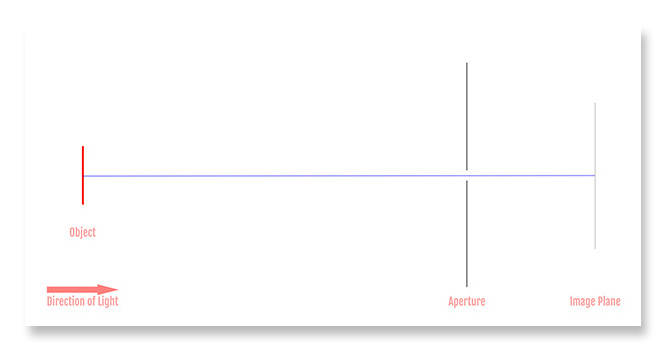
Here is a figure showing the front wall of the box with the hole, the Aperture and, further to the right, the surface on which the image is formed, the Image Plane.
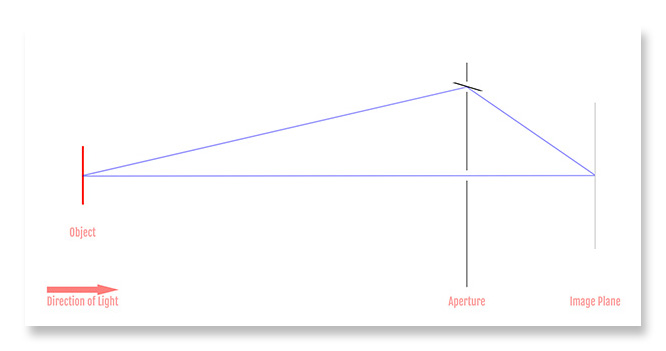
And here's an idea: we drill a second hole in the intermediate surface and, with a very small mirror placed there, we send another beam of the original object onto the final surface. Thus, we have doubled the amount of light it receives.
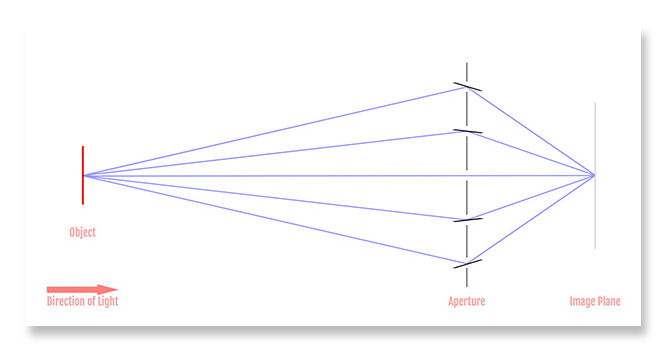
And why not, since our idea was successful, not to multiply the holes and the mirrors that correspond to each one. This way we manage to get much more light to the point than if we had only one ray. Much more energy. History says that once, someone, with this system, managed to burn the entire enemy fleet!
However, this construction with mirrors is very complicated and above all very fragile. So, here's another idea: instead of a mirror, we use a prism. The prism in the same way sends the second ray to the point we want.
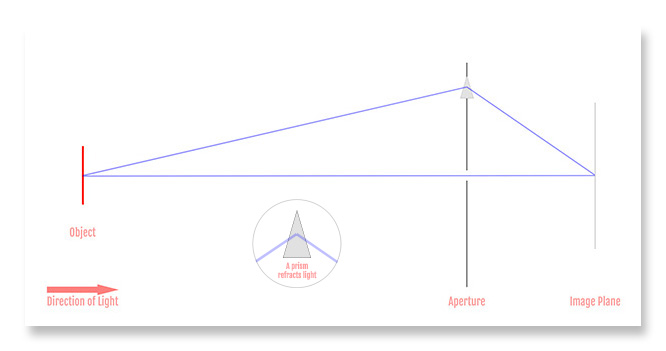
Again as before, we multiply the prisms and in this way we have many rays leaving the same point from the original object and arriving at a single point on the final surface.
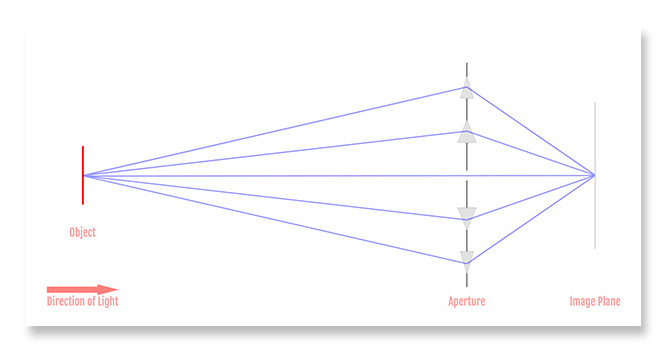
Finally, the many prisms we will have used, one next to the other end up creating a single body, which is what we call a lens. It is the simplest optical element we can use for any optical construction.
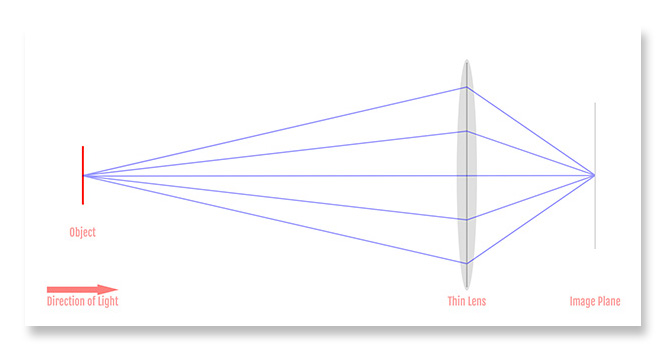
And here is the setup of how a simple lens allows us to form a complete image.
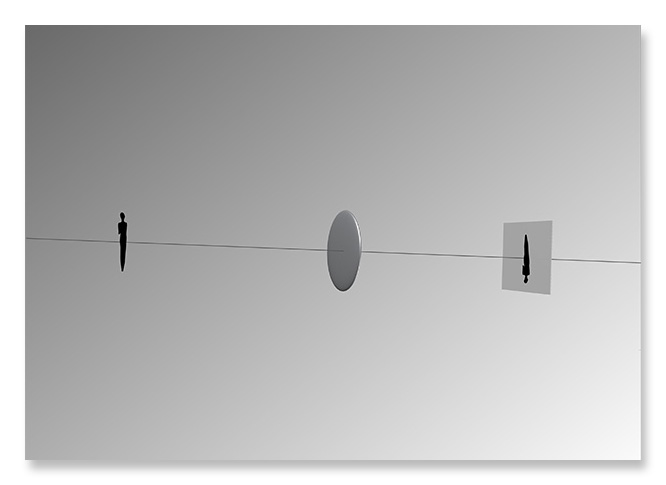
And the real thing…
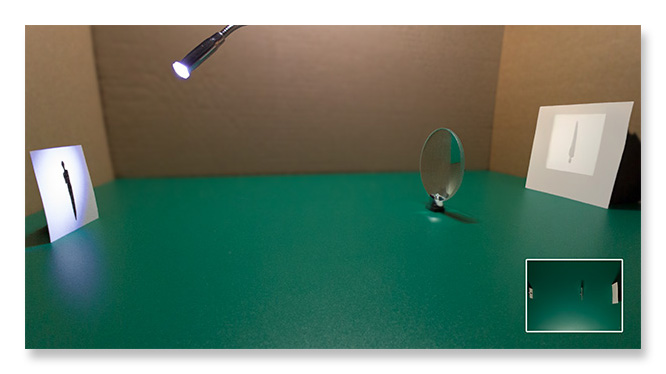
Don't be surprised from the exaggerated distortion of the perspective. This is due to the very short distance from the objects the photo was taken. The Object Plane and the Image Plane, in the reality are perfectly parallel. See the little image, how the setup is normally seen.
In the next chapters we will see all the features of this simple lens and how we use it, especially in photography.
Note: Please, don’t, some of you, start shooting at me now because, "OK this but..." or "yes but the other..." and such! Of course there are a lot of other details in all this. But here, I oversimplify on purpose because the point is to explain as simply as possible, how all this works!